Nail Care Basics For Cats
Let us start by stating NEVER DECLAW CATS. Declawing is a barbaric practice where a veterinarian surgically amputates the last bone of each toe. If performed on a human being, it would be similar to cutting off the last joint of each finger and toe! Declawing is painful and typically has lasting negative effects on cats which can manifest with both physical and behavioral issues.
It is important to note that the act of scratching is a normal and healthy part of cat behavior – Cats are supposed to scratch/wiggle their toes/knead. This activity actually serves a purpose: cats scratch to mark territory via visual markings and scent which comes from glands in their paws. Scratching also helps them shed the outer layer (or sheath) of their claws and exercise the digits of their toes. It has mentally soothing properties as well. Providing cats with dedicated surfaces intended for scratching gives them an appropriate outlet for this behavior.
Pet parents worried about being scratched need to keep their cats’ nails trimmed properly and implement some basic training/re-directing to teach their cats to not use their claws on people or furniture, but to use them on their scratching post or scratcher lounge. Cats can learn to keep their nails retracted when carried with trust building exercises (remember back nails do not fully retract like the front). If you have young children, you may want to consider vinyl nail covers such as Soft Paws which are comfortable for the cat and prevent an accidental scratch while a youngster is learning to interact and hold the cat correctly.
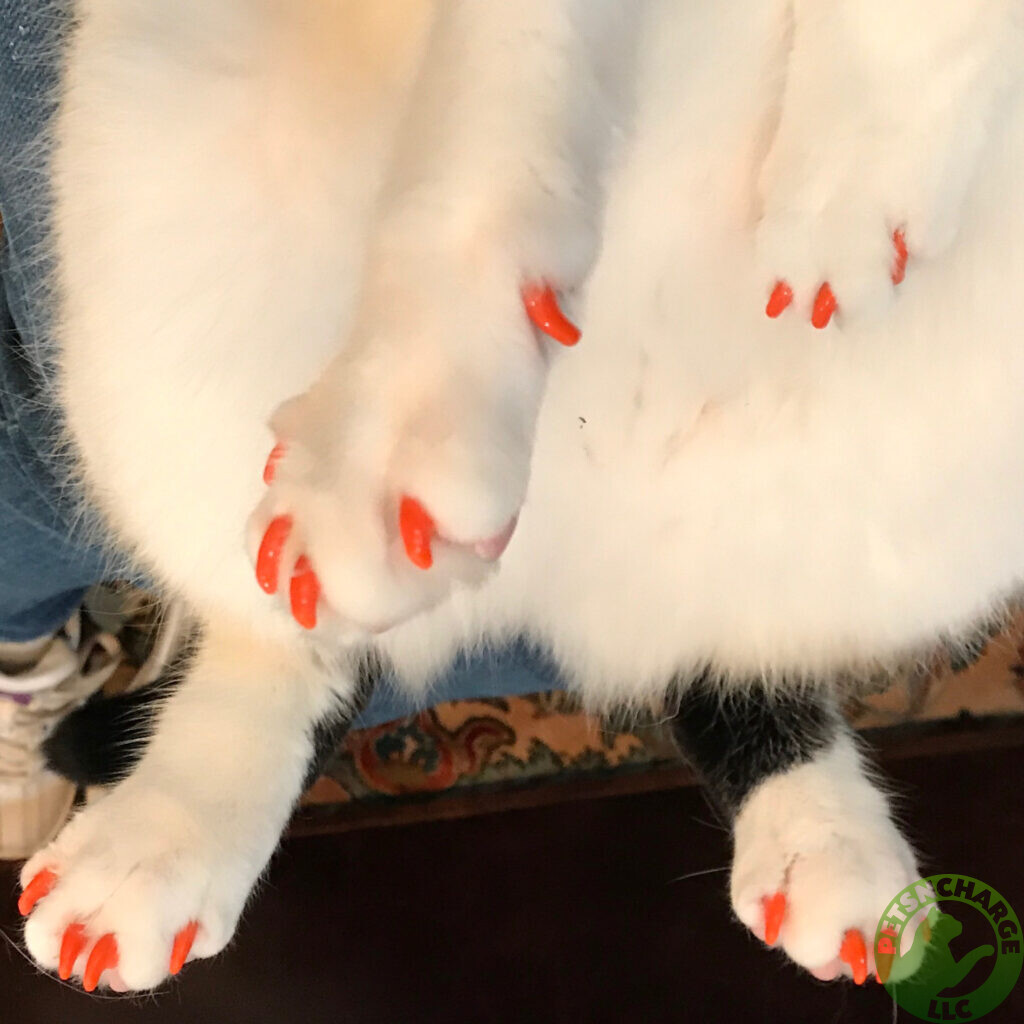
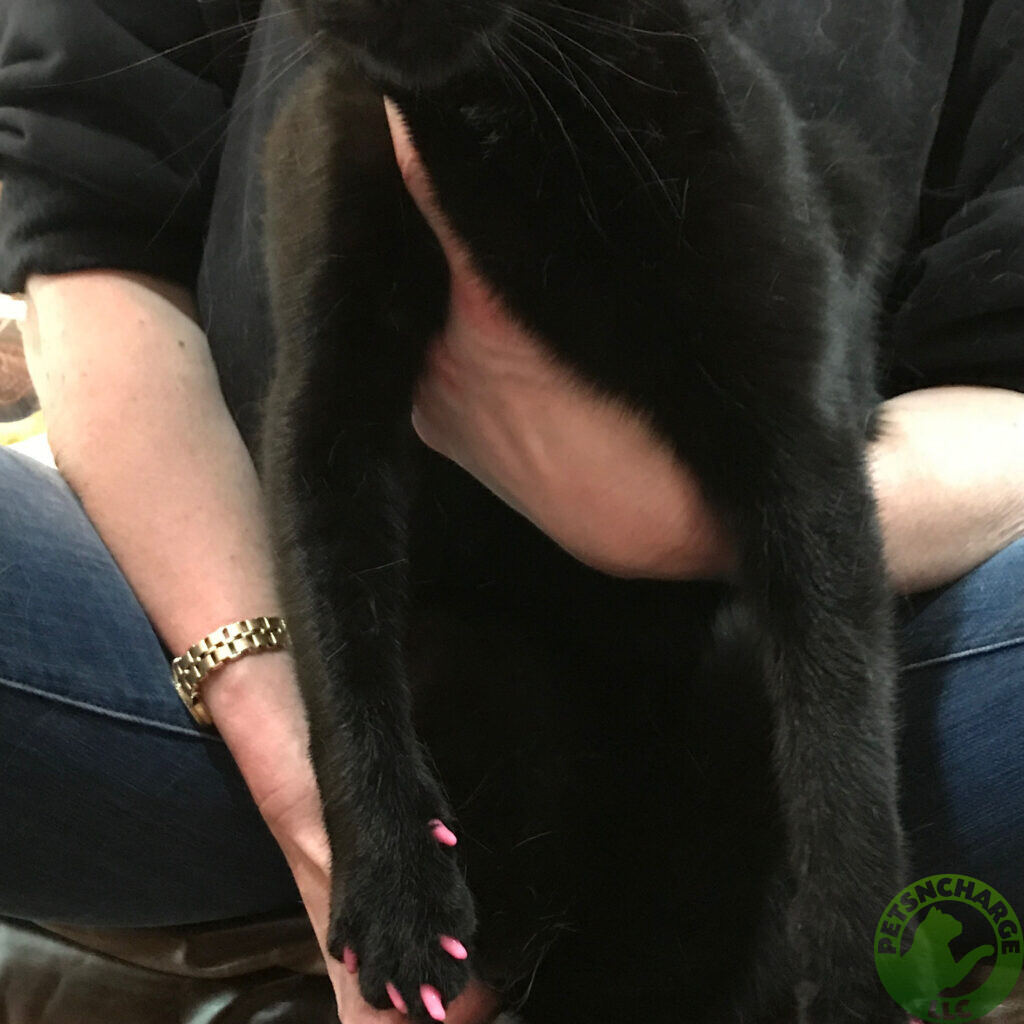
This type of nail covering comes in many sizes and needs to be re-applied every 4-6 weeks. Getting the correct fit is important (several sizes might be needed for a proper fit) — if they are too big, the claws cannot retract and if they are too small, they will fall off. If applying to several cats, a different color for each cat can help identify if a cap has fallen off (found).
Moving on to the topic at hand, proper maintenance for feline nails.
Nail clipping is essential, especially for senior and indoor cats whose nails can get very long. If allowed to grow unchecked, a cat’s nails can curl into its paw pad and/or become snagged on things which creates the risk of the nail pulling out completely. Both of these conditions are painful, require veterinary intervention and are completely avoidable with proper nail care. Cats that spend time outdoors need their nails to climb, hunt and defend themselves. You should check their nails regularly and trim as needed, clipping only the tips. Many cats do not initially enjoy having their nails clipped. Starting this practice when they are kittens and doing it regularly helps them become accustomed to it.
There are a few different styles of cat nail clippers on the market. The traditional options are the guillotine-type (not advised) and scissor-type clippers, but several veterinary websites show standard human toenail clippers being used for this purpose. Companies have developed products specifically designed for cats which are modeled after human clippers.


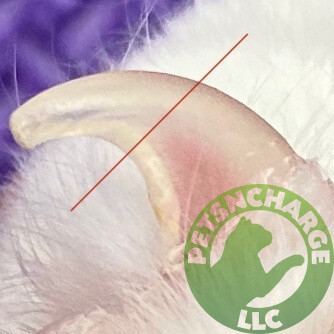
After trying all three types, I prefer those inspired by human clippers as they allow the best view of the cat nail and quick, the pink/red part at the base of the claw that contains nerves and blood vessels. Trimming into the sensitive quick will be painful for your cat and will cause bleeding, so never clip if you are unable to see the quick! When you are first learning, err on the side of caution and clip less, as it’s better to clip more often than to accidentally remove too much.
The red line denotes the top of the quick:
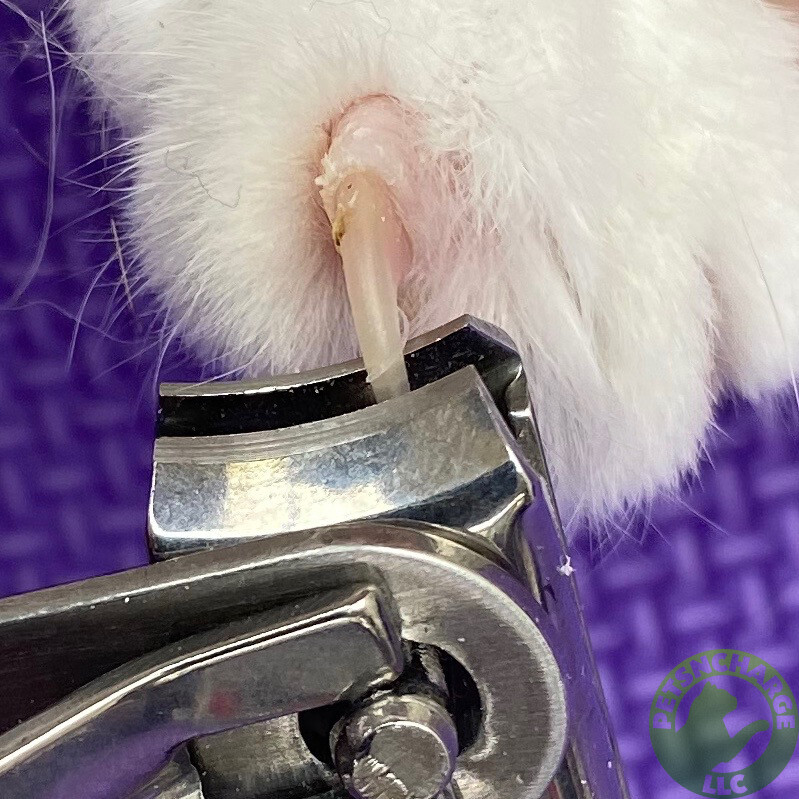
The position of the clippers is important — always hold them perpendicular to the nail so that you are trimming the nail top to bottom. Trimming at this angle puts less stress on the nail and creates a blunt end. Do not hold the clippers parallel to the nail (i.e. cutting side-to-side) as that squeezes the nail together which will cause pain for your cat and can leave the nails pointy or cause them to splinter. Think of the position you would clip your own nails.
This is the correct positioning of the clippers, perpendicular to the nail:
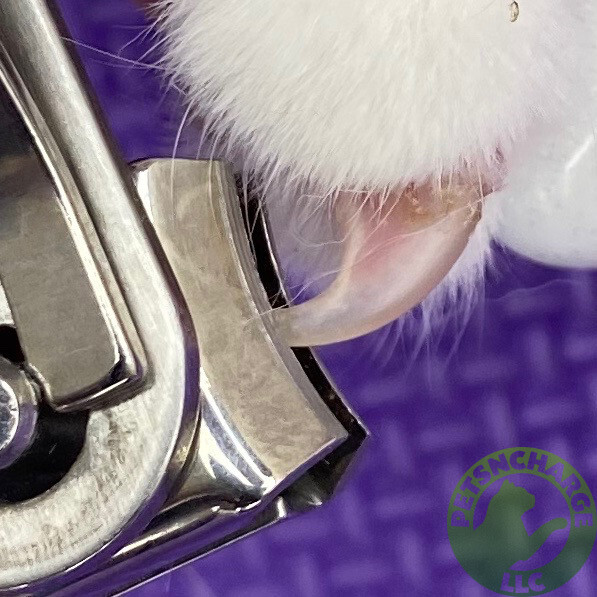
Do NOT do it this way:
And here is the step-by-step breakdown to get you started:
Practice rubbing their feet/toes and pushing your cats nails out regularly so this becomes a familiar and pleasant experience (Paw Massage). Once the cat is accustomed and feels calm while having their feet held and rubbed, clipping will be much easier.
Find a calm and quiet well-lit space. Sufficient lighting will shine through the nail which will provide you with a clear view of the quick.
Position your cat directly against your body, facing away from you which will prevent your cat from backing away to escape the situation.
Gently squeeze the paw pad to expose the retractable claws.
Hold the clippers perpendicular to the nail and clip. Remember: Do not clip unless you have a clear view of the quick!
When you are new to clipping, it is best to trim a small amount, just the top few millimeters above the quick on each nail. I usually ease the cat into it by trimming the nails of the front paws only as they are easier to do. If the cat is calm, it is okay to continue; if not, clip in stages. When cats are new to clipping, I like to do the thumbs and back nails at a different time, building up to all as they become accustomed to clipping.
With practice and patience, both you and your cat will become more relaxed with the process, making it easier for you to clip the nail shorter. For many cats, the process eventually becomes a pleasant experience.